How to use aThemes gets a lot easier the moment you stop treating it like “just a theme install“ and start treating it like a controlled build. We have seen the pattern: someone flips on a new theme on a live site, the header shifts, the shop looks odd, and suddenly everyone is “busy” in Slack.
Quick answer: pick the aThemes product that matches your goal, install it on staging first, set global styles before you design pages, then add only the plugins that support speed and conversions, with SEO, security, and privacy guardrails from day one.
Key Takeaways
- How to use aThemes effectively starts by choosing the right theme for your next 90-day goal (publish content, book calls, or sell products) instead of picking by looks alone.
- Install and test any aThemes theme on a staging site first, then push changes live to avoid broken headers, WooCommerce styling issues, and rushed fixes.
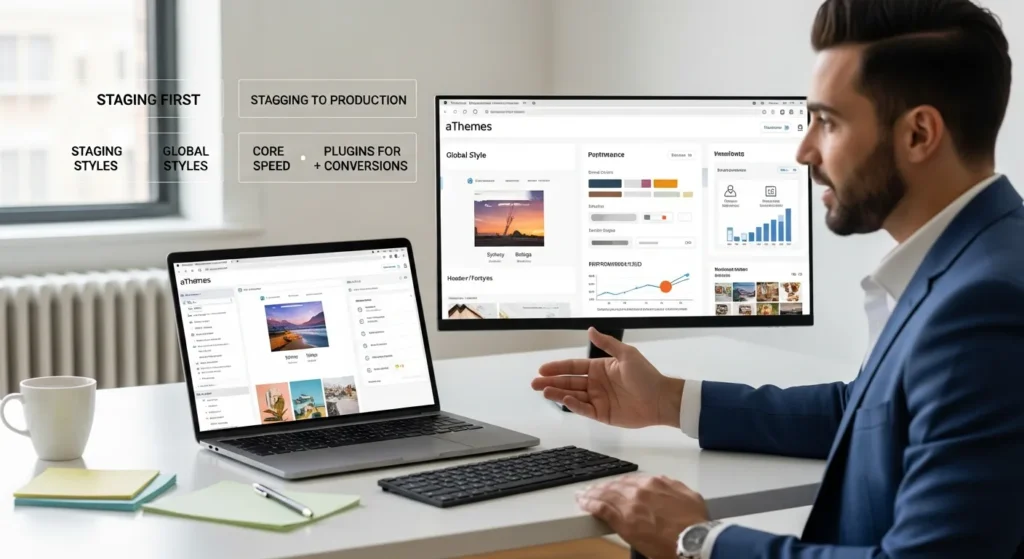
- Set global styles (logo, colors, typography, buttons, header/footer) before designing pages to prevent rework and keep your brand consistent site-wide.
- Launch core pages early—Home, About, Services, Contact, and Privacy—so your site feels trustworthy and ready for leads, sales, and compliance.
- Add only the plugins that directly support speed and conversions—use one caching plugin, optimize images and fonts, and build clear CTAs, forms, and social proof.
- Make the site business-ready from day one with SEO basics (indexing, titles/meta, internal links, Search Console), steady security habits (updates, backups, least-privilege access), and privacy disclosures where required.
Choose The Right aThemes Product For Your Site Goal
The fastest way to get value from aThemes is to choose one product that matches one business goal. aThemes is known for themes like Sydney and Botiga, plus helpful add-ons and blocks built to work with common WordPress workflows.
Here is the cause-and-effect we use when we scope builds: the theme you choose affects your layout options, which affects your page speed, which affects your conversions. Start from the outcome, then work backward.
Free Vs Pro Themes: What You Actually Get
Free themes can be enough for a brochure site or an MVP. Pro usually earns its keep when you need tighter control and less fiddling.
What you usually get with Pro (and what it changes):
- More layout controls -> reduces custom CSS -> cuts long-term maintenance.
- More starter templates -> speeds up page creation -> gets you to “publish” faster.
- Support and updates -> lowers risk during WordPress core changes.
If you plan to monetize soon, Pro often costs less than the time you will spend patching gaps.
Picking A Theme By Use Case: Blog, Business Site, Or WooCommerce
Pick by job, not by screenshot.
- Blog and content site: prioritize typography, archive layouts, and clean headings. Your theme affects readability, and readability affects time on page.
- Business site (lead gen): prioritize header layout, hero sections, and simple page templates. Your pages affect trust, and trust affects form submissions.
- WooCommerce: choose a WooCommerce-friendly theme like Botiga if you run a store. Product grids affect browsing, and browsing affects add-to-cart.
If you are unsure, decide what matters more in the next 90 days: publishing content, booking calls, or selling products. That single answer usually picks the theme for you.
Install An aThemes Theme Safely (Without Breaking Your Live Site)
Theme installs feel harmless until they are not. The safe move is simple: install and test on a staging site first, then push to production.
If your host offers staging (many do), use it. If not, we often spin up a temporary copy on a subdomain. Your staging setup affects your confidence, and your confidence affects how quickly you ship.
Install From The WordPress Theme Directory
For free aThemes themes:
- Go to Appearance > Themes > Add New.
- Search the theme name.
- Click Install, then Activate.
- Visit the front end in an incognito window.
Next steps: check your header, menus, and homepage settings under Settings > Reading.
Upload A Premium Theme ZIP And Verify Licensing
For premium aThemes themes, you normally upload a ZIP:
- Go to Appearance > Themes > Add New > Upload Theme.
- Upload the ZIP and activate.
- Enter your license key where the theme prompts you.
License activation matters because updates reduce risk. The license key affects update delivery, and updates affect security.
If WordPress rejects the ZIP, your server may limit upload size. Fix it through your host panel or ask support to raise limits.
Helpful reference points:
- WordPress theme install steps: Installing a theme (WordPress.org, updated regularly).
- Manual upload path basics: WordPress uses /wp-content/themes/ for theme files.
Set Up Your Theme The Right Way: Branding, Layouts, And Core Pages
Most “theme problems” are really setup problems. People design pages first, then change global styles later. That sequence causes rework.
We prefer this sequence: set brand styles -> set layout defaults -> build core pages -> only then add extra sections.
Use The Customizer Or Site Editor (Block Themes) For Global Styles
What you use depends on the theme type:
- Customizer (classic themes): go to Appearance > Customize.
- Site Editor (block themes): go to Appearance > Editor.
Start with global basics:
- Logo and site title
- Colors
- Font pairing and font weights
- Button style
- Header and footer layout
Global styles affect every page, and every page affects how “consistent” your brand feels.
Build Essential Pages: Home, About, Services, Contact, And Privacy
Ship the pages that make your site feel real:
- Home: one clear promise, one primary CTA.
- About: who you help, why you are credible, a photo that looks like a human.
- Services: pricing ranges or packages if you can share them.
- Contact: form plus email, phone, and business hours.
- Privacy: required if you collect data.
If you want a clean structure, we keep URLs simple: /about/, /services/, /contact/.
If you want a deeper WordPress build path, we cover planning and launch sequencing here: WordPress website development.
Work With Templates, Blocks, And Starter Content Without Lock-In
Starter templates help you move fast, but you still want control.
Our rule: use templates for layout, then replace the copy and images right away. Stock content affects trust, and trust affects conversions.
If you use aThemes blocks or Elementor add-ons, keep your pages modular:
- One section per goal (hero, benefits, proof, CTA)
- Reusable blocks for FAQs and testimonials
- Minimal animation
That setup keeps you portable. If you ever change themes later, clean content structure makes the move easier.
Add aThemes Plugins To Improve Speed, UX, And Conversions
Plugins should earn their spot. Each plugin adds features, and features add code. More code affects speed, and speed affects sales.
aThemes offers tools like aThemes Blocks (blocks such as Container, Heading, Button, Text, Icon, Image) and premium add-ons that can add theme-building features in Elementor.
Performance Basics: Caching, Images, And Font Choices
Start with what moves the needle:
- Caching: pick one caching plugin, not three.
- Images: compress and serve modern formats when possible.
- Fonts: stick to one or two font families.
A simple performance checklist we use on client sites:
- Serve properly sized images.
- Limit heavy sliders.
- Avoid loading five different icon packs.
If you want help turning these into a monthly routine, our maintenance team handles this kind of work: WordPress maintenance services.
Conversion Building Blocks: Forms, CTAs, And Social Proof
If the site goal is leads or sales, build conversion elements early:
- Forms: a contact form plus one “request a quote“ or “book a call“ form.
- CTAs: one main CTA per page.
- Social proof: testimonials, client logos, review snippets.
Your CTA placement affects clicks, and clicks affect revenue. Keep CTAs specific: “Get a quote“ beats “Contact us” for many service businesses.
If you run WooCommerce, add trust signals near the buy box: shipping notes, returns policy link, and payment icons.
Make Your aThemes Site Business-Ready: SEO, Security, And Compliance
A good-looking site that leaks data or fails indexing is not a business asset. We build guardrails while the site is still small because fixes cost less then.
SEO Setup: Titles, Indexing, Schema, And Internal Linking
Start with the basics that control visibility:
- Set your site to public: Settings > Reading and confirm you do not block search engines.
- Write one clear title and meta description per page.
- Add internal links from blog posts to service pages.
Internal linking affects crawl paths, and crawl paths affect ranking.
We also suggest setting up Search Console early. Google explains the setup here: Google Search Console (Google, updated regularly).
If you want a guided approach for WordPress-specific search work, see our service page: WordPress SEO services.
Security And Maintenance: Updates, Backups, And Least-Privilege Access
Security is mostly habits.
- Update WordPress core, themes, and plugins on a schedule.
- Run backups you can restore.
- Give each user the lowest role that still lets them do their job.
Least-privilege access reduces damage, and reduced damage shortens recovery time.
WordPress covers user roles and capabilities here: Roles and capabilities (WordPress.org).
Privacy And Disclosures: Cookies, Analytics, And Regulated Content Guardrails
If you collect form leads, run ads, or use analytics, you need privacy basics:
- A plain-English privacy policy
- Cookie consent where required
- Disclosures for affiliate links and paid endorsements
If you publish ads or endorsements, the FTC rules apply. The FTC keeps guidance here: Disclosures 101 for social media influencers (Federal Trade Commission).
And a strong reminder from us: do not paste sensitive medical, legal, or financial client data into any AI tool. Keep regulated advice human-led and documented.
Troubleshoot Common aThemes Issues (And Fix Them Fast)
Most fixes fall into three buckets: caching, conflicts, or settings.
Here is why this matters: your theme affects layout, plugins affect behavior, and caches affect what you see. If you change one layer, you can misread the result.
Customizer Changes Not Showing, Broken Layouts, And Conflicting Plugins
Try this order:
- Clear your cache (plugin cache, host cache, browser cache).
- Disable one plugin at a time on staging.
- Switch to a default theme briefly to test if the issue follows the theme.
If a layout breaks after you install a plugin, the plugin affects CSS and JavaScript, and those files affect rendering.
Mobile Menu, Typography, And WooCommerce Styling Fixes
Common quick wins:
- Mobile menu: check if a header builder setting controls breakpoints.
- Typography: set fonts globally first, then override only when needed.
- WooCommerce styling: confirm the theme loads WooCommerce templates and that no “checkout editor” plugin overrides them.
If product pages look “off,“ test with all non-store plugins disabled on staging. You often find one styling plugin that hijacks buttons.
When To Use A Staging Site And How To Roll Back Cleanly
Use staging when any change touches:
- Theme files
- WooCommerce checkout
- Payment plugins
- Site-wide headers and footers
Rollback should be boring. Keep:
- A full backup before change
- A list of what you changed
- A restore point in your host panel
A restore point affects recovery speed, and recovery speed affects revenue. That is the whole point.
Conclusion
If you want to know how to use aThemes without stress, treat your site like a system: pick the right theme for the job, make changes on staging, set global styles first, and add plugins only when they support a clear business goal.
If you want a second set of eyes, we do this every week for small teams that do not want theme drama on a Tuesday. You can start small with a one-page tune-up or a staged theme swap, then expand once the workflow feels stable.
Frequently Asked Questions (aThemes)
How to use aThemes without breaking my live WordPress site?
The safest way to use aThemes is to treat it like a controlled build: install the theme on a staging site first, test headers, menus, and key pages, then push changes to production. This prevents surprise layout shifts, WooCommerce issues, and emergency fixes on a live site.
How do I choose the right aThemes theme for my site goal (blog, business, or WooCommerce)?
Choose by outcome, not by screenshot. For blogs, prioritize typography and archive layouts. For business lead-gen sites, focus on header layouts, hero sections, and simple templates. For WooCommerce, use a store-ready theme like Botiga since product grids and templates directly affect browsing and add-to-cart behavior.
What’s the difference between free vs Pro aThemes themes, and when is Pro worth it?
Free aThemes themes can work for brochure sites or MVPs. Pro is usually worth it when you need more layout control, more starter templates, and reliable support and updates. Those features reduce custom CSS, speed up page building, and lower risk when WordPress core updates change things.
How to use aThemes global styles correctly before designing pages?
Set global styles first to avoid rework later. In classic themes, use Appearance > Customize; in block themes, use Appearance > Editor. Start with logo, colors, typography, button styling, and header/footer layouts. Global choices apply everywhere, improving brand consistency across every page.
Why are my aThemes Customizer changes not showing, or why does the layout look broken?
Most issues come from caching, plugin conflicts, or settings. Clear all caches (plugin, host, browser), then disable plugins one by one on staging to isolate conflicts. If needed, switch briefly to a default theme to see whether the problem follows the theme or a plugin’s CSS/JavaScript.
What plugins should I add with aThemes for speed and conversions without slowing my site down?
Add only plugins that earn their spot. For performance, use one caching plugin, compress images, and limit fonts to one or two families. For conversions, add forms, clear CTAs (one primary per page), and social proof. Avoid stacking multiple overlapping plugins, since extra code usually hurts speed.
Some of the links shared in this post are affiliate links. If you click on the link & make any purchase, we will receive an affiliate commission at no extra cost of you.
We improve our products and advertising by using Microsoft Clarity to see how you use our website. By using our site, you agree that we and Microsoft can collect and use this data. Our privacy policy has more details.